A Step-by-Step Tutorial on AI Guided Style Transformation Steps
Discover AI guided style transformation steps in this tutorial, including setting up models, transferring styles, and real-world examples in art and marketing.
8 minutes read
Key Takeaways
- Style transfer fundamentals: Use convolutional neural networks to blend a content image with a style image by balancing content loss and style loss.
- Tools & workflows: Choose between no-code platforms (e.g., Prisma, DeepArt) or code-based libraries (TensorFlow, PyTorch) depending on your skill level.
- Hands-on process: Set up your environment, load a pre-trained model, run initial transfers, adjust hyperparameters, and refine the output.
- Real-world applications: Enhance creativity in art, marketing design, and fashion prototyping.
- Best practices: Start with pre-trained models, monitor GPU usage, tweak style-content ratios carefully, and follow research forums for updates.
Table of Contents
- Understanding the Basics
- Preparing for the Transformation
- Step-by-Step Tutorial
- Practical Examples and Use Cases
- Additional Tips and Best Practices
- FAQ
Understanding the Basics of AI Guided Style Transformation Steps
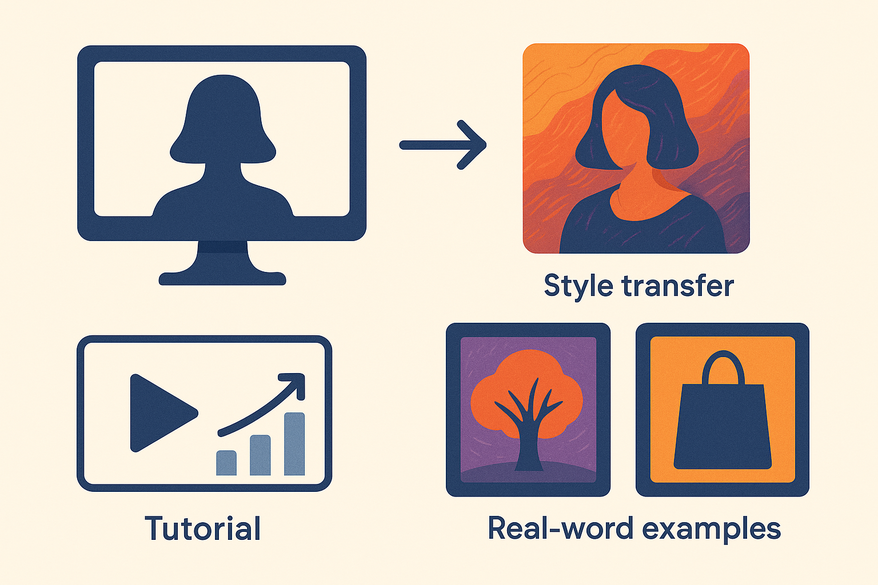
Core concept: AI-guided style transformation (style transfer) uses a convolutional neural network to blend a content image with a style image. The network computes two losses:
- Content loss: measures differences from the original photo.
- Style loss: measures adherence to textures and brush strokes of the style source.
Key terms:
- Content image: the main subject (e.g., a photo).
- Style image: the reference artwork (e.g., a painting).
Role of AI in creative work:
- Art: turn photos into Van Gogh or Picasso versions.
- Design: test new color palettes or layouts quickly.
- Fashion: mock up fabric prints on virtual garments.
Prerequisites:
- A basic understanding of neural networks (helpful for code-based tools).
- Familiarity with image files (JPEG, PNG).
- For code users: Python basics and libraries like TensorFlow or PyTorch (updated to recent versions).
Source: Mastering Style Transfer in AI
Preparing for the Transformation with AI Guided Style Transformation Steps
Required tools & platforms:
- No-code/low-code: Spline, DeepArt, Prisma, and newer tools like RunwayML and Artbreeder.
- Code-based: TensorFlow 2.14+, PyTorch 2.1+, Keras (fast-style-transfer repo updated for latest compatibility).
Setup steps:
- Verify GPU availability; install CUDA 12.x and cuDNN 8.x compatible with TensorFlow/PyTorch recent versions.
- Create project folders:
/content_images/style_images/outputs
- Install dependencies:
pip install tensorflow==2.14 pillow matplotlibpip install torch==2.1 torchvision torchaudio --index-url https://download.pytorch.org/whl/cu121
Sources for assets:
- Open datasets (e.g., WikiArt for paintings).
- Personal photo libraries or brand guidelines.
Source: Telnyx AI Image Style Transfer
Step-by-Step Tutorial on AI Guided Style Transformation Steps
Step 1: Setting Up and Loading the AI Model
- Clone or download a style transfer repo:
  git clone https://github.com/lengstrom/fast-style-transfer.git
- Install requirements:
  pip install -r fast-style-transfer/requirements.txt
- Load a pre-trained model (VGG19 is common for its layer features):
from model import StyleTransferModel
model = StyleTransferModel.load_pretrained('vgg19')
VGG19 remains effective because its deep layers capture detailed textures while shallow layers maintain content structure. For faster or higher-quality results, consider newer architectures like EfficientNet-based style transfer models or transformer-based approaches (e.g., Vision Transformers) increasingly supported in PyTorch and TensorFlow.
Step 2: Inputting Style Directives and Running Initial Transfer
- Load and preprocess images:
from PIL import Image
import torch
# Load images
content = Image.open('content_images/photo.jpg').resize((512,512))
style   = Image.open('style_images/painting.jpg').resize((512,512))
# Convert to tensor
import torchvision.transforms as transforms
to_tensor = transforms.Compose([
    transforms.ToTensor(),
    transforms.Lambda(lambda x: x.mul(255))
])
content_tensor = to_tensor(content).unsqueeze(0)
style_tensor   = to_tensor(style).unsqueeze(0)

- Run one iteration and save:
output = model.transfer(content_tensor, style_tensor, iterations=1)
output_image = output.squeeze().permute(1,2,0).clamp(0,255).byte().cpu().numpy()
Image.fromarray(output_image).save('outputs/initial.png')
Inspect the initial output to check content vs. style balance:

Step 3: Adjusting Parameters for Desired Stylistic Results
- Content/style weighting: α for content, β for style. Start with α=1, β=1e3; raise β for stronger stylization. Dynamic weighting schedules (e.g., gradually increasing β during iterations) can improve results.
- Layer selection: use shallow layers to preserve shapes and deeper layers for textures and brush strokes.
- Example: to emphasize brush strokes, increase style weight on deeper conv5_1 layer or equivalent in newer models.
Step 4: Refining and Finalizing the Output
- Post-processing: color correction and contrast adjustments with PIL, Photoshop, or AI-powered editors like Adobe Photoshop’s Neural Filters; crop to highlight key areas.
- Upscaling: use waifu2x, ESRGAN, or newer AI upscalers like Real-ESRGAN or Gigapixel AI for high-resolution results.
- Export commands:
output_image.save('final_output.png', format='PNG')output_image.save('final_output.jpg', quality=95)
- Troubleshooting: noisy output → lower style weight or add iterations; OOM errors → reduce image size or batch size; consider mixed precision training/inference (FP16) to save memory.
Source: Telnyx AI Image Style Transfer
Practical Examples and Use Cases of AI Guided Style Transformation Steps
Case Study 1: Artistic Creation
Goal: turn a selfie into Van Gogh’s “Starry Night” style with multiple iterations (α=1, β=1e4). Outcome: swirling textures achievable within minutes using modern GPUs like NVIDIA RTX series. (Number Analytics guide)
Case Study 2: Marketing Design
Workflow: apply corporate color palettes and patterns to ad visuals in batch using cloud GPU services (AWS, GCP). Outcome: multiple branded images generated efficiently with optimized pipelines. (Enrollify style guide)
Case Study 3: Fashion Prototyping
Task: simulate denim, silk, and leather textures on 3D garment renders using AI style transfer combined with 3D software like CLO3D. Result: prototype looks ready for review, saving sampling time.
Each example delivered significant time savings and fresh aesthetic results, with improved fidelity thanks to advances in neural style transfer algorithms and hardware acceleration.
Additional Tips and Best Practices for AI Guided Style Transformation Steps
- Always start with pre-trained models to avoid long training cycles.
- Tweak style-content ratios gradually to prevent artifacts; consider using automated hyperparameter tuning tools.
- Monitor GPU memory and CPU usage during transfers, leveraging tools like NVIDIA Nsight or built-in PyTorch/TensorFlow profilers.
- Stay updated via research forums like Papers with Code, Reddit r/MachineLearning, and AI communities such as Hugging Face forums.
Conclusion
You’ve now covered the full workflow: from style transfer basics and environment setup to hands-on tutorials, real-world use cases, and expert tips. By mastering these steps, you can supercharge your creative projects—whether you’re an artist, marketer, or designer.
Ready for seamless tracking and insights on your AI-driven transformations? Check out Maxx Report for a tailored dashboard and recommendations, updated with enhanced analytics and integration options.
FAQ
- What is AI guided style transfer?
AI guided style transfer uses neural networks to recombine the content of one image with the artistic style of another. - Do I need a GPU?
A GPU accelerates transfers significantly, but small images can run on a CPU for experimentation. - Can I use this for videos?
Yes—by applying style frame by frame or using specialized video style transfer models increasingly accessible. - Where can I find more styles?
Explore open-source datasets like WikiArt or create custom style collections from your own images.